Image Map
Would you be so kind as to "like" my facebook page?

Please excuse the lack of photos in some of my older posts as I am trying to slowly go back through and add the photos that were accidentally deleted

November 4, 2010

Chicken Divan


My dear blogging friend and inspiration, Krista, never ceases to amaze me. Her recipes never let me down. I knew when I saw this one that I would love it. And boy was I right! I mean, we love all of these ingredients. It has been a little while since we made this, and I am craving it again! This baby may make it's way into one of my meal plans very soon....

Yes. It is Chicken Divan. And it is divine. 

I used two boneless skinless chicken breasts specifically. The original recipe calls for 4 cups but I just used two breasts without measuring them in cups. I boiled the chickens because I knew I would be shredding it once finished cooking, and I knew baking might make it too hard to shred. I like the method of boiling chicken whenever I need to shred it, so I will stick to that.


While those chickens were boiling, I microwaved my bag of broccoli. I buy the kind that comes in a bag already rinsed, and you can microwave the broccoli right in the bag! So easy and quick! So I microwave steamed the broccoli and then chopped it all up into smaller pieces. Then I spread some vegetable oil on the bottom of my glass baking dish to prevent sticking. You can use cooking spray if desired, I just didn't have any at the time. Once the oil was on the bottom of the dish, I sprinkled all of the chopped broccoli on the bottom layer and spread evenly. Then I seasoned that broccoli with some salt.


Once the chickens were finished boiling, I shredded them with a fork and then seasoned it with some garlic powder. Then I added the shredded chicken to the baking dish, covering the broccoli and then spreading evenly.


For the mixture, I combined the soup, mayo, lime juice, curry powder, and 1/2 tsp garlic powder in a bowl and mixed well. I used cream of mushroom soup rather than chicken soup like the original recipe called for. I also used lime juice rather than lemon juice because that's what I had at the moment. Then I poured the mixture on top of the chicken in the dish and spread evenly.


And of course any casserole wouldn't be complete without some cheese on top. So I sprinkled 1 cup of shredded cheddar cheese on top of the soup/mayo mixture. Then I tossed the bread crumbs with the melted butter and sprinkled on top of the cheese....


and baked at 350° for 30 minutes...

and out popped deliciousness!


Chicken Divan adapted from Krista's Kitchen
  • 12 oz. package of pre-rinsed broccoli
  • 2 boneless skinless chicken breasts
  • 1 can of cream of mushroom soup
  • 1/2 cup mayo
  • 1 tsp lime juice
  • 1/2 tsp curry powder
  • 1/2 tsp garlic powder, plus a bit more
  • 1 cup shredded cheddar cheese
  • 1/2 cup bread crumbs
  • 2 tbsp butter, melted
  • vegetable oil or cooking spray
Boil chickens for about 20-30 minutes until cooked through.  Once finished cooking, shred them with a fork and season with garlic powder.

Cook broccoli - (I microwaved mine in the bag, but you can steam it if you like). Cut up into small pieces. Spray a casserole or baking dish and then cover evenly with the broccoli pieces. Season the broccoli with salt. Then spread the shredded chicken evenly over the broccoli.
In a bowl, combine soup, mayo, lime juice, curry powder, and 1/2 tsp garlic powder and mix well. Then pour the mixture evenly over the chicken. Sprinkle cheese on top. Then toss bread crumbs with the melted butter and sprinkle on top of the cheese.

Bake at 350° for 30 minutes.


*Note: I liked the addition of curry powder, but I think that next time I would use less. That 1/2 teaspoon goes a lonnnnnng way!

We served this with some delicious and flavorful Corn, Avocado, and Tomato Salad.


I am linking this Chicken Divan recipe to Foodie Friday.

I decided I need to link to more blog hops, so I am stepping outside of my normal Foodie Fridays and Martha Mondays to link up to some others  :) Linking up to...


Recipe Swap Thursday 
Family Friendly Fridays
Friday Potluck 
Seasonal Sunday
 
Can you say DELISH?

I did!


November 1, 2010

Menu Planning - Week of 11/1/10

Last week's menu plan didn't go 100% according to plans, but it went well for the first week. None of the meals were eaten on the actual day that I assigned for them. We didn't end up making the  white chicken enchiladas, the horseradish parmesan potatoes, or the sole fillets. I really look forward to making those in the near future! They sound yummy! But anyways, we made everything else... just not on that exact day.

I'm proud of myself! I did this week's menu planning yesterday, went to the grocery store and got everything we needed... all by myself! It didn't take as long as last week either, but still not as fast as I want the process to go. I'm just glad that we are doing it. It means less trips to the grocery store (for the most part, unless we need to get something that should be bought the day of cooking) and it means I don't have to ask myself what we are having for dinner every single day after work. Yay for menu planning!

I tried to use up some items we had such as mushrooms, potatoes, asparagus, and elbow macaroni.  And since we didn't end up making the white chicken enchiladas from last week's menu plan, we will make those this week. These are the meals I came up with....


Tuesday 11/2:  Mexican chicken with jalapeno popper sauce, and rotini

Wednesday 11/3:  Eat out

Thursday 11/4:  French-fried onion chicken tenders with horseradish parmesan potatoes (adapted from this recipe)


Friday = pay day so then I can go grocery shopping again! I had a limited amount of money to spend on groceries this time around so I only made my menu plan up until Friday. I do have a homemade mac and cheese recipe for two to go with whatever main course we decide to have over the weekend.

I am linking up to Menu Plan Monday over at I'm an Organizing Junkie.

Martha Mondays : Guacamoldy with Creature Chips

Yesterday was Halloween, and I hope everyone had a fantastic time! I was excited to make these Guacamoldy with Creature Chips for my company Halloween party, and for Martha Mondays


Unfortunately, I didn't think the guacamole recipe was too good. Granted, I didn't use exact measurements. Maybe that's where I went wrong? But it tasted a little too lime-y and was not seasoned well. I guess I am used to Chipotle's guacamole. I did like the idea of using cookie cutters to make shapes for the tortilla chips. I used cat and bat cookie cutters. Next time I would probably use a different kind of tortillas, as mine were too thick. I used a chipotle as well as a yellow corn tortilla, so next time I will stick to flour tortillas. They seem to be thinner. Also, I cooked the tortillas for longer than 12 minutes, and they still were not crispy enough, not enough like a tortilla chip. So overall I was disappointed with the taste-factor of the recipe. But the idea is super cute! And I will definitely make it again with some adjustments. Here is Martha's original recipe below.


Guacamoldy with Creature Chips from Martha Stewart

*Serves 8
  • Plain or butter-flavored vegetable-oil cooking spray
  • 24 assorted large flour tortillas, such as plain, whole wheat, and sun-dried tomato
  • Coarse salt
  • 3 pounds ripe Hass avocados, (about 7), pitted. peeled, and cut into chunks
  • 1/4 cup freshly squeezed lime juice, (about 3 limes)
  • 1/4 teaspoon freshly ground pepper
  • 1 fresh jalapeno chile, seeded and finely chopped
  • 1/4 cup chopped fresh cilantro leaves
Preheat oven to 350 degrees. Coat a baking sheet with cooking spray. Using a few Halloweeninspired cookie cutters, cut shapes from tortillas. Arrange as many shapes as can fit in a single layer on oiled sheet. Coat tortillas with cooking spray, and season with salt. Bake until slightly darkened and crisp, 10 to 12 minutes. Transfer to a wire rack to cool. Repeat with remaining tortilla shapes, using a clean, cooled baking sheet.
Put avocados, lime juice, 11/2 teaspoons salt and the pepper, jalapeno, and cilantro in a large bowl. Mash with a fork until chunky. Serve with chips.

And here's PJ and I all dressed up on Halloween! We are still big kids at heart  :)


October 29, 2010

Buffalo Turkey Burgers

Ever since I started blogging, I have wanted to try different meats besides my usual chicken with an occasional pork or steak. A couple of months back, I came across this burger recipe at Thyme for Wine (clever name!) and it uses ground turkey rather than the usual ground beef. Perfect way to try a different kind of meat, I thought. Of course, like always, I had to make a few changes to suit our likings as well as cut the recipe down because it originally yields 6 servings but we were making enough just for the two of us. We ended up making four burgers total, but I should have known that there is NO way I could eat two of these! They are plump! So really I only had one burger, and didn't really need to make four total... I don't remember the exact measurements, so I will just supply the original recipe from Rebecca in regards to the ingredient amounts.


Buffalo Turkey Burgers adapted from Thyme for Wine

*Yields: 6 servings
  •  1.2 lbs lean ground turkey
  • 1/2 white onion, finely chopped
  • 1/3 cup bread crumbs
  • salt and pepper to taste
  • 1 tbsp olive oil
  • 1/3 cup hot sauce/buffalo sauce
  • 6 slices of mozzarella cheese (I used pepper jack cheese)
  • 6 hamburger buns
  • lettuce for serving
  • celery sticks for serving
In a large bowl, combine the ground turkey, chopped onion, bread crumbs, salt and pepper. Once incorporated, form into 6 equally sized patties. 

In a large skillet, heat 1 tbsp olive oil over medium-high heat. Once the oil is hot, add the turkey burger patties to the skillet. Cook on each side for at least 7 minutes (depending on the thickness of the burgers). 

Once the burgers are done, toss them in a bowl of buffalo sauce. Set the burgers on a baking sheet lined with foil, place a piece of cheese on top and put in the oven to broil for two minutes (I put it on 'bake' at 200° just enough to melt the cheese). At this time, you can toast the buns in the oven if you like. 

When serving, place a small piece of lettuce on each bun, then the burger, and then any toppings of your choice like blue cheese crumbles or dressing on top. 

Note: You can serve them with celery sticks too for a real buffalo feel.

Unfortunately, I didn't really enjoy this meal. Dipping them in the hot sauce makes them very spicy, so just brush some on top if you don't want too much heat. And I found I didn't really like the ground turkey texture or flavor. It's probably a personal preference. Ok so maybe I'm not a ground turkey kinda gurl? Not 100% sure, but I don't think I will be making this recipe again. Maybe I will give ground turkey another try in another recipe, like chili or some other kind of burger.

October 28, 2010

Three Cheese and Chicken Stuffed Shells


I feel like I haven't been posting many recipes lately. Not as many as I want to, I guess. Hey, it's a busy life. I have been trying to work out more after work, and also have had many errands and things that need to be done lately, so I haven't had much time for blogging about recipes. It takes time to upload the pictures and edit them and write the posts! But I hope to get on it!

This here is a recipe that I found over at Deborah's Taste and Tell blog. Her blog is so nicely laid out, with a recipe archive for easy access to all of her recipes. Her pictures are beautiful, which I always look for! And she has an abundance of recipes to offer! This is just one of her many recipes which I have either tried or plan to try in the future.

I boiled a pot of water and cooked the large pasta shells according to the package instructions. While that was cooking, I combined the diced chicken, all of the ricotta cheese, only 2 ounces of the mozzarella cheese, all of the Monterey cheese, sour cream, bread crumbs, parsley, and salt and pepper - all in a large bowl. I mixed them all together well. I took this picture before I added the diced chicken... oops! But add that in too and mix it!


Then I sprayed my beloved casserole dish with some non-stick cooking spray and then  spread a thin layer of spaghetti sauce covering the bottom of the dish.  I stuffed that wonderful filling inside all of the cooked pasta shells and then placed the shells inside of the dish. You will need to stack them on top of each other because obviously just one layer isn't going to be enough! 


Then pour some of that spaghetti sauce over top of all of the stuffed pasta shells. And don't forget to top with the remaining mozzarella!


Then bake that bad boy at 350° F for 40 minutes. Try it, you won't be sorry.

Three Cheese and Chicken Stuffed Shells adapted from Taste and Tell

*Serves 4
  • 6 ounces large shell pasta
  • 1 chicken breast half, cooked and diced (we used chicken thighs with the skin-on because that's what we had)
  • 8 ounces ricotta cheese
  • 3 ounces shredded mozzarella cheese, divided
  • 3 ounces shredded Monterey Jack cheese
  • 1 tablespoon sour cream
  • 3 tablespoons dried bread crumbs (I used Progresso's Italian style)
  • 3 tablespoons chopped fresh parsley
  • salt and pepper to taste
  • 1 cup spaghetti sauce

Preheat oven to 350° F. 

Bring a large pot of water to a boil. Salt water, then add pasta and cook according to package directions. Drain and set aside

In a large bowl, combine chicken, ricotta cheese, 2 ounces of mozzarella cheese, Monterey Jack cheese, sour cream, bread crumbs, parsley and salt and pepper. Mix well.

Spray a baking dish with nonstick spray and cover the bottom of the dish with a thin layer of spaghetti sauce. Fill each large shell with the chicken/cheese mixture and place in the dish. Cover with the remaining sauce and then sprinkle the remaining mozzarella cheese on top.

Bake at 350° F uncovered for 40 minutes. Serve warm.


I am linking this recipe to Foodie Friday.

October 26, 2010

Menu Planning - Week of 10/25/10

I am hopping on the meal-planning bangwagon. It can only be a good thing for our lives. We need order! So yesterday PJ went to Kroger and got everything on the list for the week. We planned out about 6 meals and sides, and some lunch ideas for me so I don't always have to eat out. I wanted to post this yesterday, you know, like a Monday kind of thing. But I didn't have the list with me. So here it is a day late. It would be nice if I could post a weekly meal plan every Monday! We will see how it goes...

Monday 10/25:  Baked Cod with Parmesan Sauce, and Lemon Butter Broccoli

Tuesday 10/26:  Chicken Tenders w/ Spicy Avocado Sauce, and Velveeta rotini  (or we may just order take-out because I have a grad school info session from 6 PM til 8 PM).

Wednesday 10/27:  Chili for two, and texas toast garlic bread

Thursday 10/28:   White Chicken Enchiladas w/ Green Chile Sour Cream Sauce, and horseradish parmesan potatoes adapted from this recipe

Friday 10/29:  Sole fillets in lemon butter, and asparagus

Saturday 10/30:   Cheesy BBQ Sloppy Joes, and Texas toast

Sunday 10/31:  HALLOWEEN! Anything goes!


I am linking up to I’m an Organizing Junkie for Menu Plan Monday.


October 22, 2010

Nacho Chicken Bake


I have already shared with you my love of a particular seasoning, and this recipe was a great place to use it. Well really, any recipe is a good one to use it if you ask me. Yes you guessed it, that delicious Grippo's seasoning! I wanted to use it in this Nacho Chicken Bake recipe that I discovered from my fellow blogging friend (and inspiration!) Krista

I made some modifications to Krista's original recipe. One of those was that I didn't use canned chicken. Instead, I had three bone-in chicken thighs with the skin on, so I seasoned them with the Grippo's seasoning before cooking.


Then I baked them at 350° until fully cooked and then diced them into smaller pieces. You can remove the skin if you would like, or use canned chicken or even boneless skinless chicken breasts. This is just what I had on hand. I probably would prefer the boneless skinless chicken breasts because the skin is useless in this recipe.

Another modification I made was that I halved the recipe, since I was making it just for the two of us. So I spread out 4 or 5 cups of cheesy Doritos on the bottom of a greased casserole dish instead of the 8 cups of Doritos that the original recipe calls for. You can grease the dish with butter or cooking spray. I'm pretty sure I used butter because I didn't have cooking spray at the time. I feel like I should have a picture for this step, but I don't. But you get the gist.  Doritos spread on bottom of dish.

Then in a large bowl, I combined a 10 3/4 oz. can of mushroom soup, 1/2 cup of salsa, 1 cup shredded Mexican cheese (I didn't half the cheese amount), 1/2 of a diced onion, 2 oz. diced jalapenos, and the cooked diced chicken. I mixed well and then poured it over the chips and spread evenly to cover the entire casserole dish.


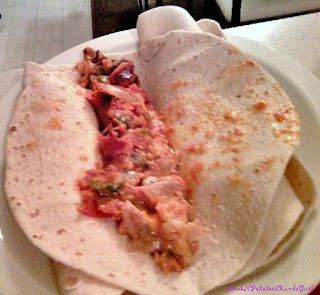
Then I sprinkled some additional cheese on top of the uncooked casserole and then baked at 350° for 35 minutes. The finished product was delicious! You can eat it as is, or like PJ who ate it in a tortilla. 


He is a creative one, that man! I just ate mine as is, with a fork and a smile  :)


Nacho Chicken Bake adapted from Krista
  • 4-5 cups cheesy Doritos
  • 3 bone-in chicken thighs with the skin on
  • Grippo's Seasoning
  • 1 can (10 3/4 oz.) cream of mushroom soup
  • 1/2 cup salsa
  • 1 cup shredded Mexican cheese
  • 1/2 an onion, diced
  • 2 oz. diced jalapenos
  • additional cheese for topping
Preheat oven to 350°. Season chickens with Grippo's seasoning, and then bake at 350° until fully cooked. Then dice chicken into small pieces.

Spread Doritos evenly onto the bottom of a greased casserole dish.

Combine soup, salsa, cheese, onion, jalapenos, and cooked chicken in a large bowl and mix together. Then spread the mixture over top of the chips, spreading evenly throughout to cover everywhere. Sprinkle the top with additional cheese.

Bake at 350° for 35 minutes.


**I am linking this one to Foodie Fridays.


Enjoy!